Configuring Logical Volumes
Set up a cluster of nodes conforming to the specifications described in Sizing. If you are using MetalK8s, do this by downloading the latest stable MetalK8s source code from the MetalK8s releases page: https://github.com/scality/metalk8s/releases. Follow the instructions in MetalK8s Installation to install MetalK8s on your cluster, instantiating the desired number of nodes.
Note
It is a best practice to install Zenko on a fresh cluster.
Minimum Volume Size for Cluster Deployments
The following volume sizes are known good for a five-node cluster.
For each node, create one volume of each of the following sizes:
- 6 GB
- 10 GB
- 12 GB
- 22 GB
- 54 GB
One additional 100 GB volume for S3 data, which can be bound to any of the nodes, is also required. For a five-node deployment, this totals five sets of five volumes, plus the S3 data volume.
Custom Sizing
For custom sizing for a cluster or a “cluster of one” (single-server) deployment, increase these base numbers. For non-MetalK8s deployments, follow your vendor or community’s instructions for configuring persistent volumes at 500 GB/node.
Create a Storage Class Manifest
On the bootstrap node, add a storage class manifest corresponding to the different volume sizes to be created on each node. This YAML file describes the general properties that a given volume type will possess.
Define each storage class using the following parameters. The only setting that deviates from the defaults is the metadata:name value.
- apiVersion: Define this as
storage.k8s.io/v1 - kind: Define this as
StorageClass - metadata: This field defines the name and labels associated with the
- storage node.
- name: You can name a node whatever you want, but it’s a good idea to keep things simple and name the node according to its size or anticipated function.
- labels: Set this to
zenko: storageclasstaking care to indent as shown in the example.
- mountOptions: Set the
mountOptionsfield to- rwand- discardas shown in the example. - parameters: This field defines the file system type and options. Set
fstypetoext4andmkfsOptionsto'["-m", "0"]', indenting as shown in the example. - provisioner: Define this as
kubernetes.io/no-provisioner. - reclaimPolicy: Define this as
Retain. - volumeBindingMode: Define this as
WaitForFirstConsumer.
Create a storageclasses.yaml file based on the following example. For the sizing described in Minimum Volume Size for Cluster Deployments, you can copy, paste, and save this example.
---
apiVersion: storage.k8s.io/v1
kind: StorageClass
metadata:
  name: zenko-storage
  labels:
    zenko: storageclass
  annotations:
    storageclass.kubernetes.io/is-default-class: "true"
mountOptions:
  - rw
  - discard
parameters:
  fsType: ext4
  mkfsOptions: '["-m", "0"]'
provisioner: kubernetes.io/no-provisioner
reclaimPolicy: Retain
volumeBindingMode: WaitForFirstConsumer
Run
kubectl apply -f storageclasses.yamlto create the resources.storageclass.storage.k8s.io/zenko-storage created
Run
kubectl get storageclassesto verify that the storage class definitions have been accepted.NAME PROVISIONER AGE metalk8s-prometheus kubernetes.io/no-provisioner 80m zenko-storage (default) kubernetes.io/no-provisioner 52s
Set Up Logical Volumes with MetalK8s
Use the MetalK8s GUI to set volume sizes. You must size the volumes during setup. The easiest way to do this is to set the volume sizes when creating them, then to assign them as follows:
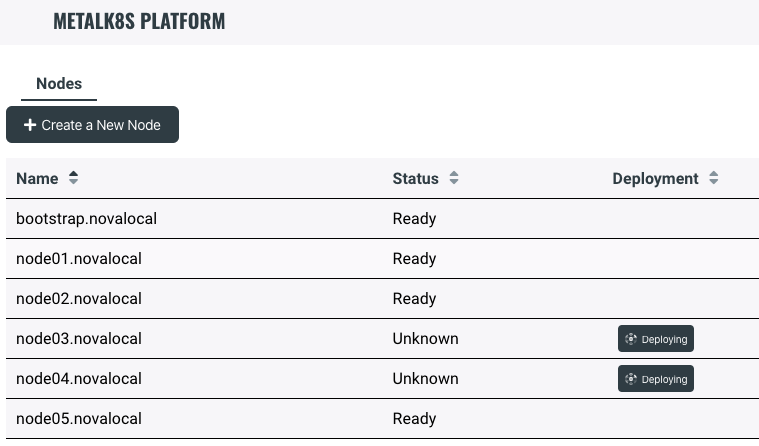
- Open the MetalK8s Platform user interface at [bootstrap]:8443.
- Click the Nodes tab.
- Review the Nodes list for nodes in your cluster with a Deploy button available in the Deployment column. Click the Deploy button to deploy available nodes.
For each node,
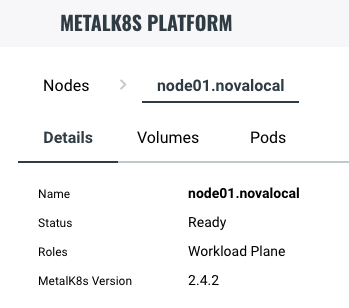
Click the name of the node in the Platform menu to display node details.
Click the Volumes tab.
Click the + button.
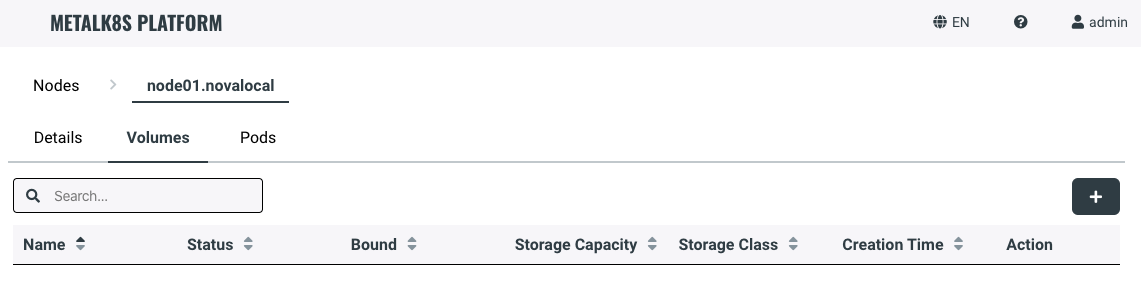
The Create a New Volume window displays.
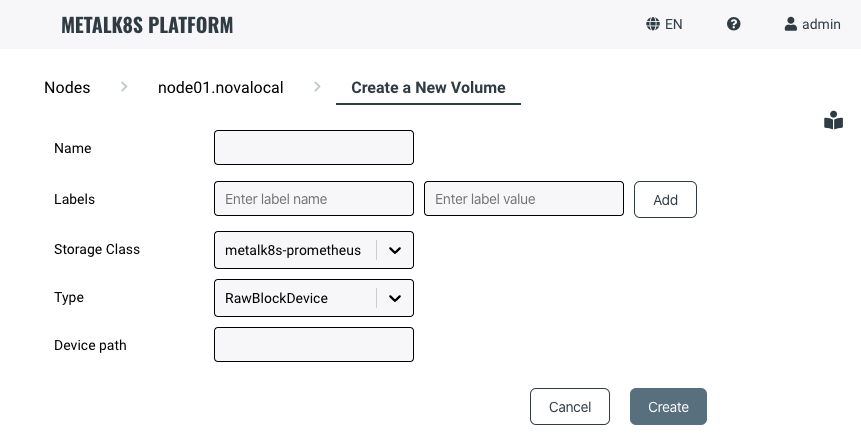
Enter the volume’s
Name This must be AWS S3 compliant: lowercase letters, numbers, and hyphens only.
Labels This is an optional, customizable key-value metadata pair for objects that pass through this volume.
Storage Class This field contains a pull-down menu of the storage class options you created in the Storage Class Manifest (storageClasses.yaml) in Create a Storage Class Manifest.
Type This presents two options: RawBlockDevice and SparseLoopDevice. The SparseLoopDevice option is intended for test environments only. Expect performance degradation if you select this option.
Device Path/Volume Capacity If you selected a raw block device in the preceding step, enter the Device path to the volume. In a virtual environment this may be /dev/vda, /dev/sda, or similar. If you selected a sparse loop device in the preceding step, enter the Volume Capacity using a dimension and size, in binary exponent format (kibi, mebi, gibibyte, etc.)
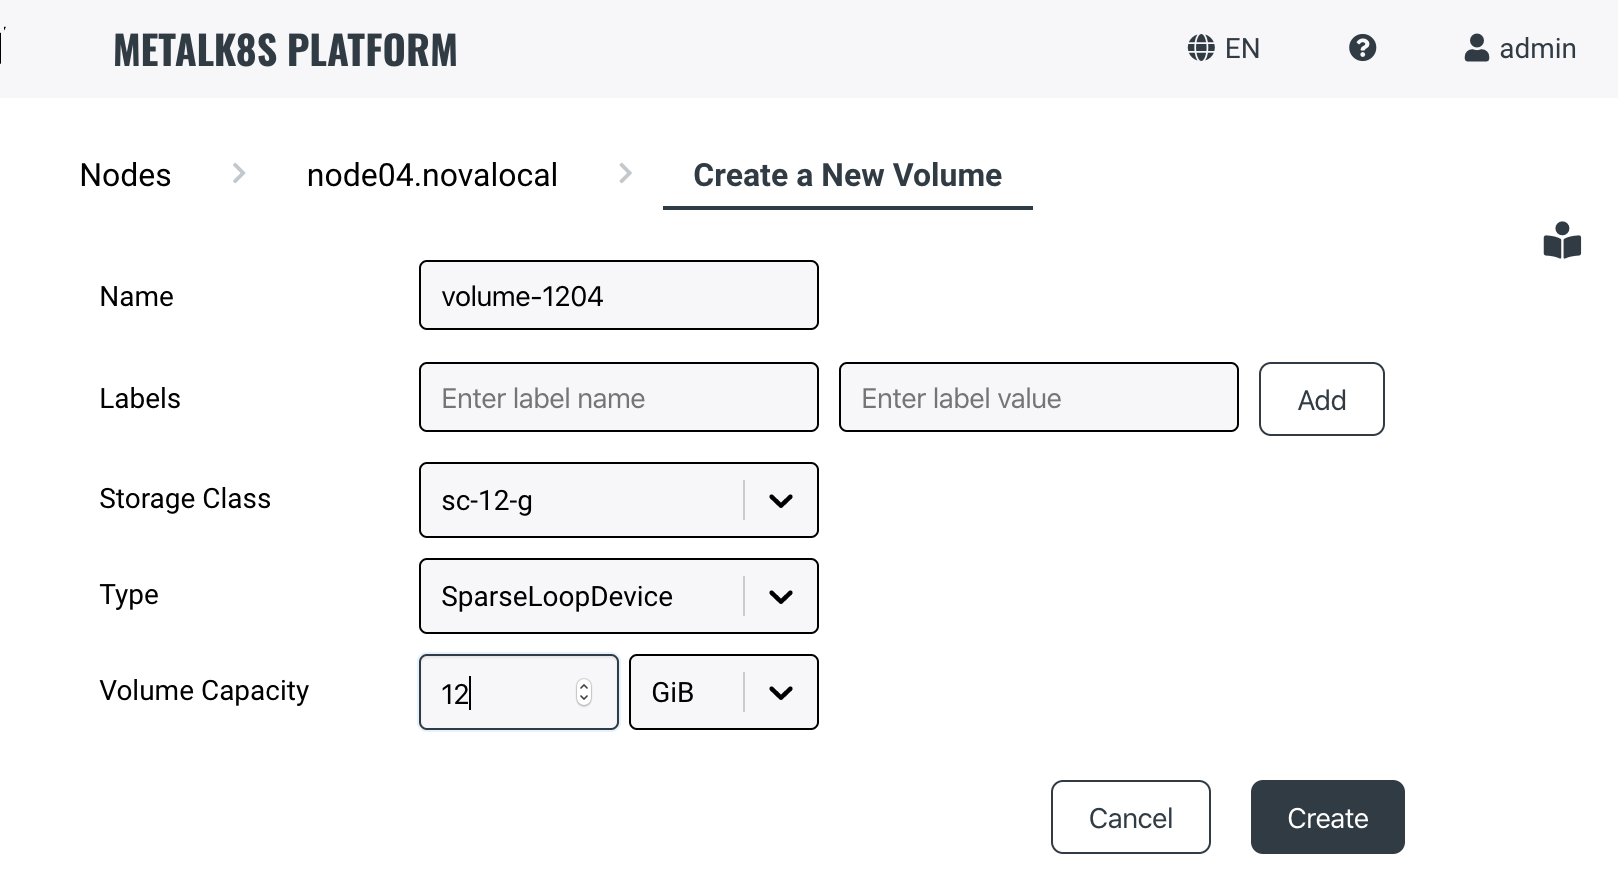
Click Create. If you’ve correctly entered all information, a success banner displays and the new volume appears in the volumes menu.

Open the MetalK8s Platform user interface at [bootstrap]:8443.
Click the Nodes tab.
Review the Nodes list for nodes in your cluster with a Deploy button available in the Deployment column. Click the Deploy button to deploy available nodes.


