Out-of-Band Updates for S3 Connector
Prerequisites
The following are required to configure out-of-band updates for S3 Connector:
- An S3 bucket must be established on an S3 Connector (version 7.4.4 or later). See “Using the S3 Browser” in S3 Connector Operation.
- The S3 Connector bucket must have permissions that enable Zenko access.
- The S3 Connector bucket must have versioning enabled.
- The Zenko user must have access to an S3 Connector user credentials (an access key and a secret key) and the S3-credentialed user must have access to the target S3 bucket.
Establishing a Zenko user in S3 Connector with all and only necessary permissions to access the bucket is considered a best practice. See “Create a Zenko User for Out-of-Band Updates” in S3 Connector Operation for how to assign correct policies to a Zenko user for S3 access.
There are no special Zenko dependencies for Zenko 1.1 or later.
Set Up Out-of-Band Updates for S3 Connector
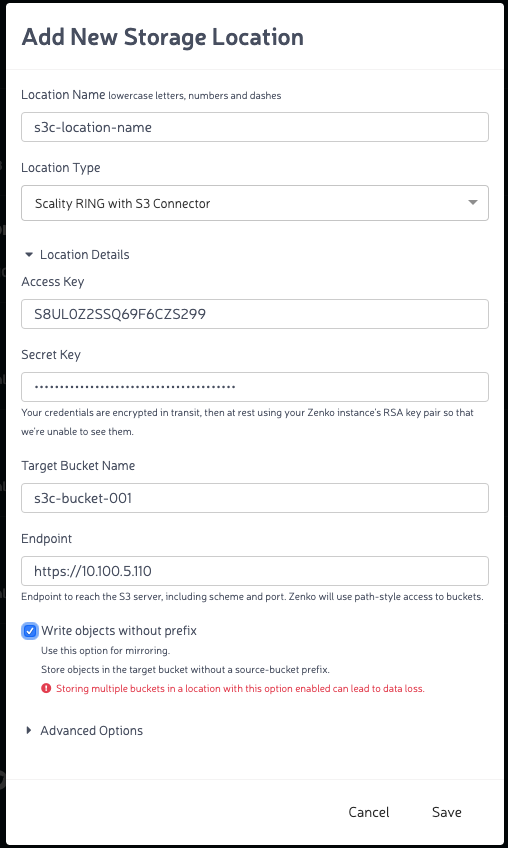
Go to Storage Locations and click the “Add New” button.
Enter the name of the new storage location (this can be the same as or different than the bucket name) and select the Scality RING with S3 Connector location type.
Enter the access key and secret key pair you copied when creating the S3 Connector bucket.
Enter the target bucket name. The Target Bucket Name field requires conformity to Amazon S3 naming conventions (Lowercase alphanumerics only. Hyphens allowed. No punctuation or diacritical marks.)
In the Endpoint field, enter the endpoint’s locator (URL or IP address), followed by the port number appropriate for the protocol. For HTTP (non-secure) use port 80, or omit the port assignment. For HTTPS, use port 443. For diagnostic, familiarization, and test purposes, port 8000 is acceptable. This directly addresses the endpoint, but bypasses load balancers.
Check the Write objects without prefix box. The warning text, “Storing multiple buckets in a location with this option enabled can lead to data loss” appears. This is expected. Click Save.
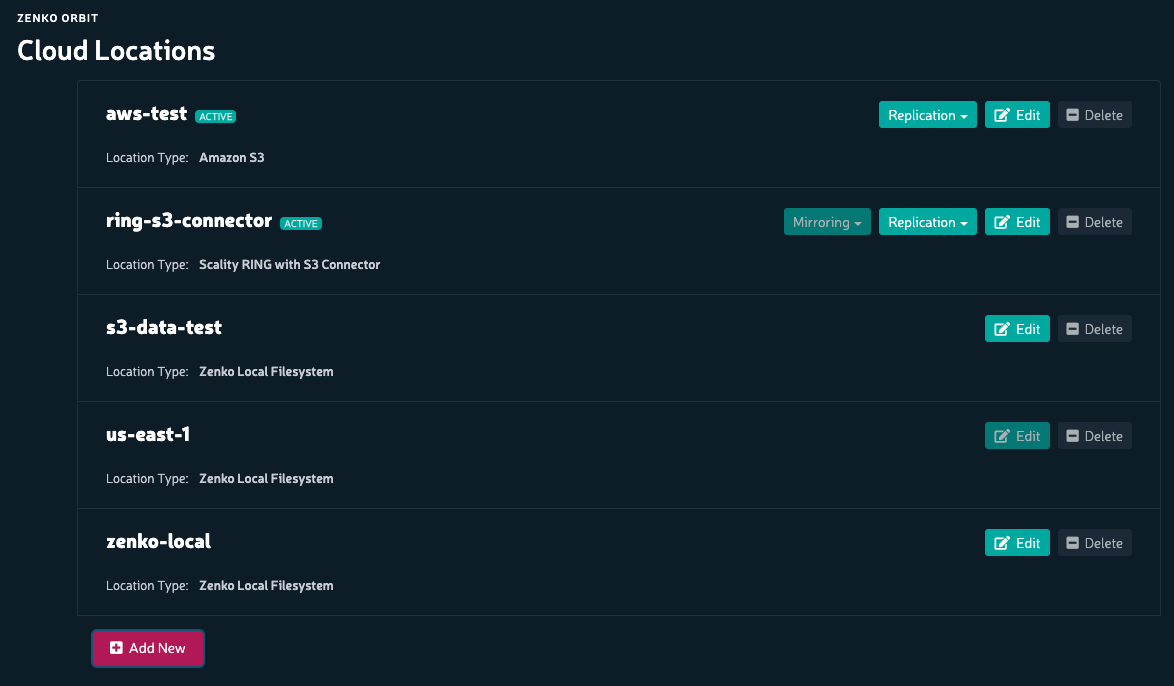
The new cloud location appears in the Cloud Locations window. The Mirroring indicator is grayed out.

Open the Multicloud Browser and click Create Bucket.
Enter the bucket name.
Select the appropriate Location Constraint. You will see two instances of the name of the storage location you created above. Pick the instance that is followed by “(Mirror mode)”.

Click Create.
The Multicloud Browser view returns.

Note the icon at far right indicating metadata ingestion has been activated. In the Cloud Locations window, the Mirroring button is activated and no longer grayed out.
In a few minutes, objects stored in the S3 Connector become visible and manageable from Zenko. Files uploaded to Zenko propagate to S3 Connector as well.


